The output of a java program is a .class file unlike the output of C program i.e .exe file. So, it is easy to execute a C program but to run a java program you need java command. In a bigger view we address the .class files into an executable .jar(Java Archive) file. So just imagine if we convert the .jar file into an .exe file, how seamlessly we can execute a program, just double click on it and run the program. So to perform this task we have many free software tools available, out of this Lunch4j is one of the tool. Now i am going to show you a simple demo using it.
Step-1:
Download the Launch4j software from Launch4j. You can download .exe file or .zip file as per your wish. But, I recommend you to download the launch4j-3.1.0-beta1-win32.zip.
Step-2:
Extract the file and save it in appropriate location.The folder structure is shown below.
 Step-3
Lunch the lunch4j.exe application by double clicking on it. A window opens like given below
 Step-4
Fill the required fields as follows in the Basic tab.
Output file: It's your required .exe file.
jar: It's your created .jar file.
For the demo purpose i have used the demo jar file available in JDK installation directory.
 You can also fill the optional fields like icon , Priority etc.
Step-5
If you try to save it now you will find an pop up window like below
 So go to JRE tab and fill the minimum JRE version according to your JDK installation viz. 1.6.0_14 for simplicity.
 Step-6
Save Configuration by clicking the button.The Configuration file is saved as .xml or .cfg file. You can edit that in your favorite XML editor viz Notepad ++.
Step-7
Click the Build Wrapper button  to convert the .jar to .exe . You can see the log file
 That's all you have successfully created the .exe file.
Step-8
Execute the .exe file created by double clicking on it to watch Java 2D Demo.
 Step-9
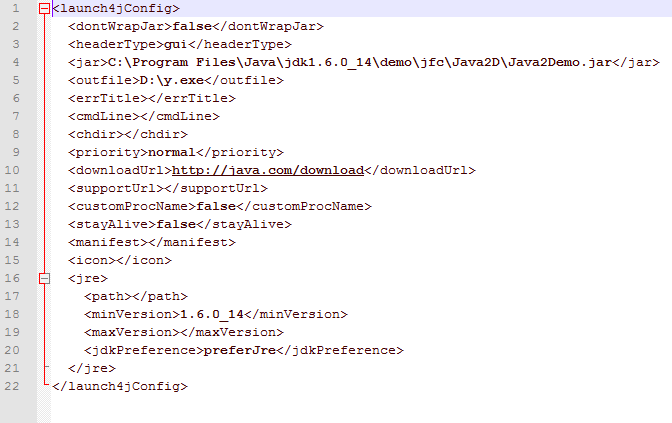
The Content of the .xml file is shown below.
 Step-10
Let's check the other tabs like Classpath, Header etc. which is self explanatory.
Step-1:
Download the Launch4j software from Launch4j. You can download .exe file or .zip file as per your wish. But, I recommend you to download the launch4j-3.1.0-beta1-win32.zip.
Step-2:
Extract the file and save it in appropriate location.The folder structure is shown below.


Fill the required fields as follows in the Basic tab.
Output file: It's your required .exe file.
jar: It's your created .jar file.
For the demo purpose i have used the demo jar file available in JDK installation directory.

Step-5
If you try to save it now you will find an pop up window like below


Save Configuration by clicking the
button.The Configuration file is saved as .xml or .cfg file. You can edit that in your favorite XML editor viz Notepad ++.Step-7
to convert the .jar to .exe . You can see the log file
Step-8
Execute the .exe file created by double clicking on it to watch Java 2D Demo.

The Content of the .xml file is shown below.
Let's check the other tabs like Classpath, Header etc. which is self explanatory.
really i enjoyed it..Thanks Prad. Keep it up
ReplyDeleteGood one.. keep teaching us new stuffs like this..
ReplyDelete